This is an example of a typical design process with the various steps leading to a ready-to-use wireless IoT product.
Design process of your wireless IoT application
An example of a typical design process with various steps leading to the ready-to-use wireless IoT product.
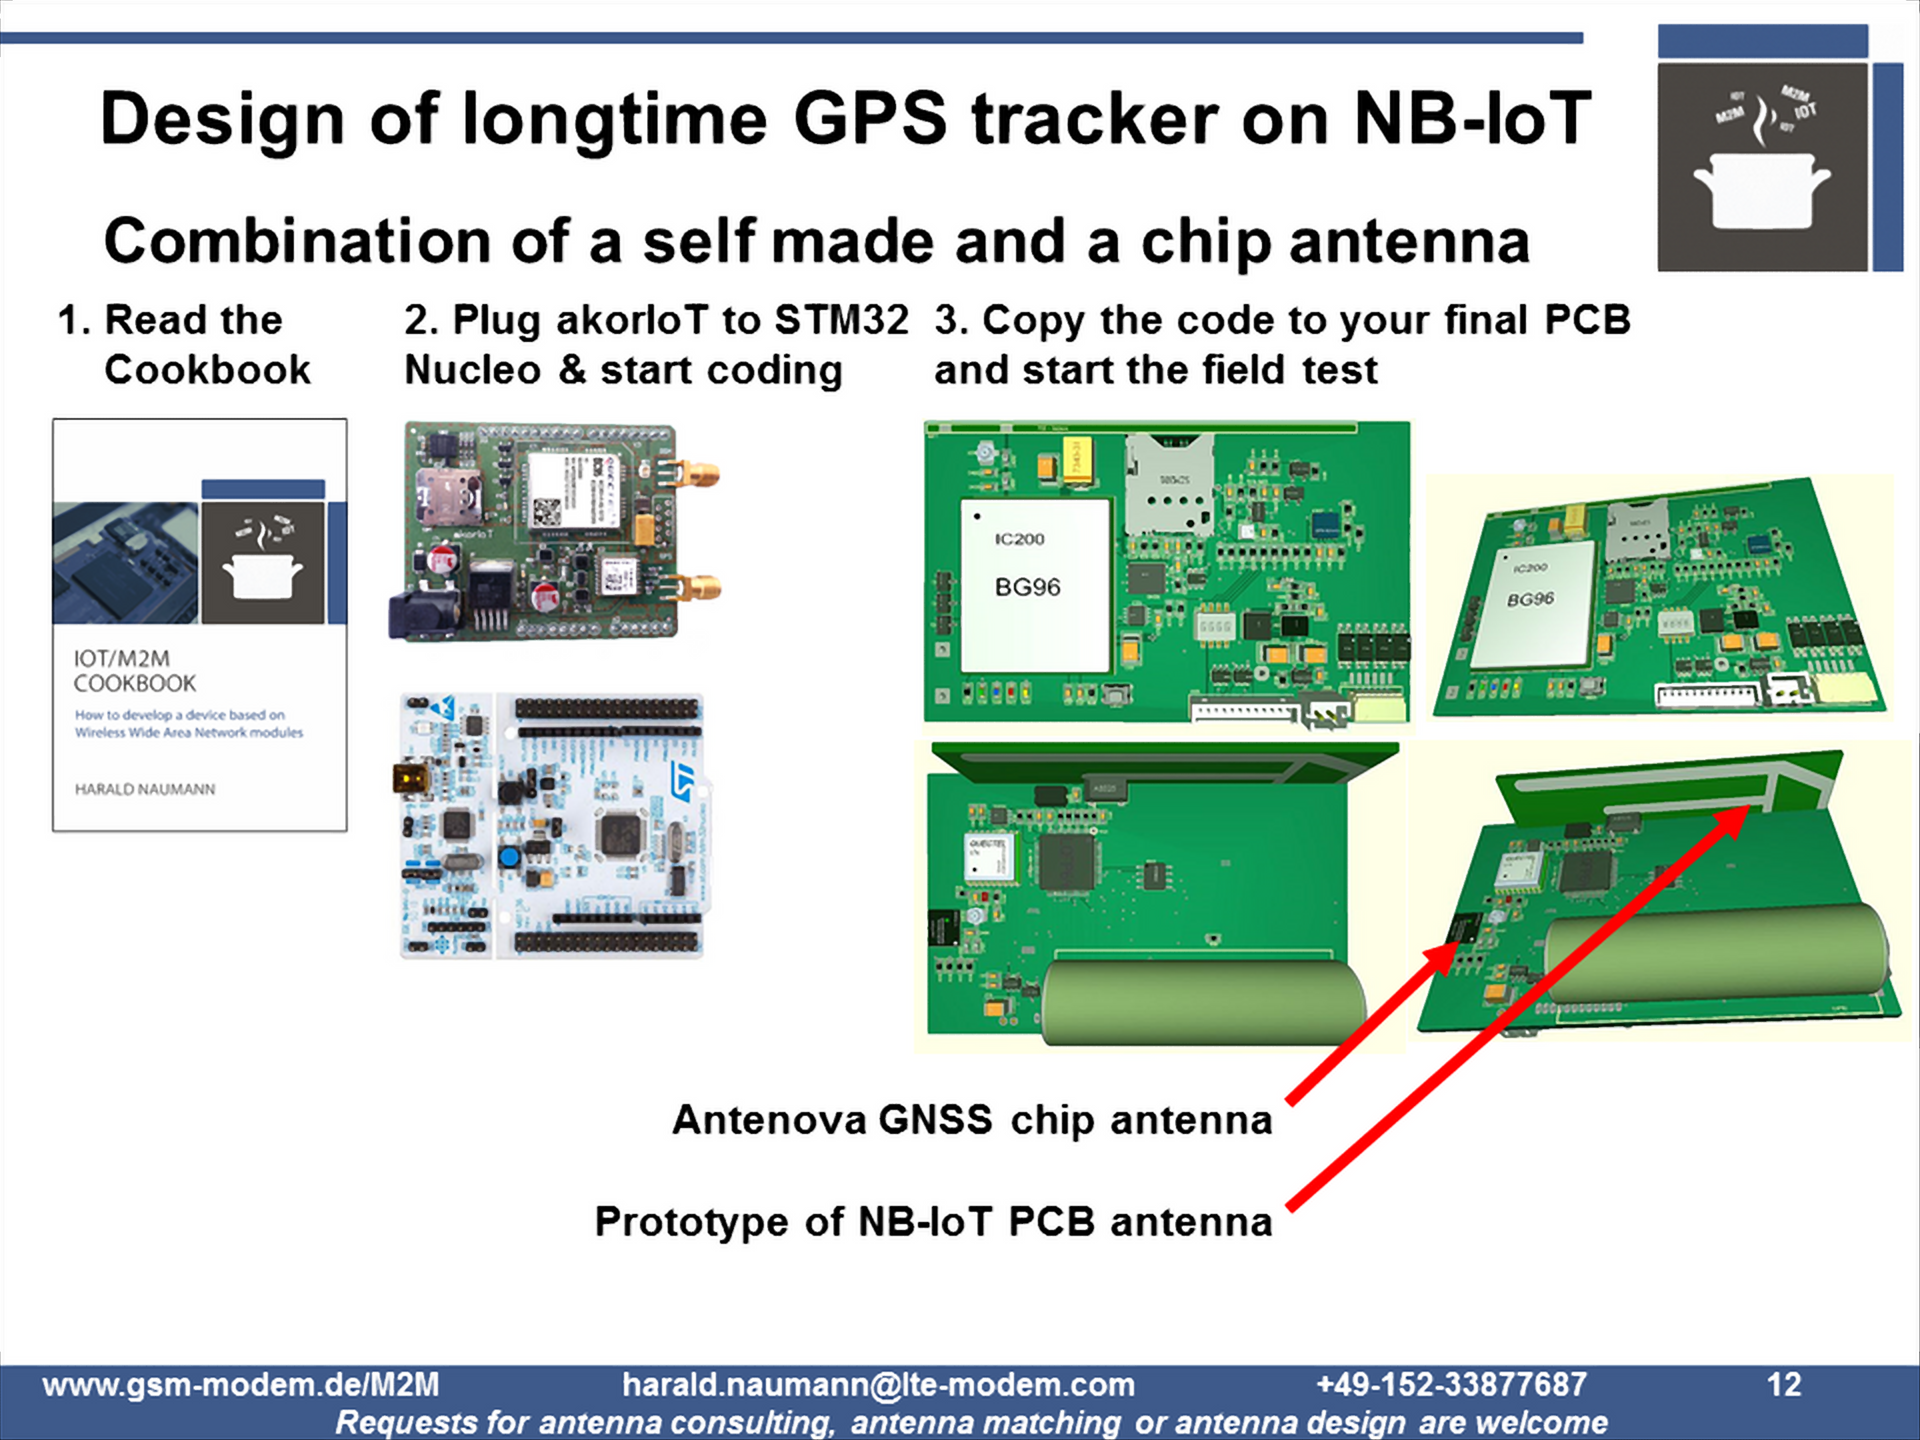
Step 1 – Read the IoT/M2M Cookbook
The IoT / M2M Cookbook is intended to help developers of wireless IoT / M2M devices to save some time and perhaps to provide some inspiring ideas to make their own products more innovative. It is a book for makers, and the goal is to guide developers from the concept stage of an IoT / M2M device all the way to the final mass-produced product. The IoT / M2M Cookbook will provide initial details such as how self-made inverted F cellular antenna and chip antennas for e.g. GPS and BT/Wi-Fi work.
To read an excerpt of the IoT / M2M Cookbook here: http://www.gsm-modem.de/M2M/m2m_iot_cookbook/
Step 2 – Plug the akorIoT radio adapter into your MCU evaluation kit
The second step will be to plug the akorIoT radio adapter into one of the MCU kits with an Arduino header. The STM32 Nucleo evaluation kits give you the freedom to select from 33 different versions. For akorIoT Nano it is almost the same. The akorIoT SensPRO customers do not need to plug anything in because the SensPRO PCBs are ready to use.
Read more: http://www.st.com/en/evaluation-tools/stm32-mcu-nucleo.html?querycriteria=productId=LN1847
akorIoT Micro radio adapters are tested on Arduino UNO and are optimised for STM32 Nucleo, because Nucleo kits offer always more than one UART. One UART will be used for the cellular module and the other for the GPS module. However, the Intel Galileo eval kit offers two UARTs as well. The Raspberry PI will be supported by a common PI to Arduino extension adapter.
Read more: http://www.akorIoT.com
Step 3 – Write your first own code for the akorIoT PCBs
The Nucleo kits on ARM Cortex M0, M3 or M4 are usually enabled for the cloud-based environments, ARM mbed C Complier and GCC GNU Compiler. With both IDEs, you will be able to access the multi-sensor or the GPS module on the akorIoT radio adapter. For akorIoT SensPRO you can select from C Compliers or Arduino STK.
Step 4 – Make your first wireless IoT PCB
In parallel to the SW development in step 2 you can start the development of your own PCBs. The HW development will be done by your team or by the akorIoT team. If your team plans to develop the PCB, then the akorIoT team will be glad to assist you and to help with design reviews. Moreover, the akorIoT team have the skills and the equipment to support you in achieving a high performance embedded antenna design.
Step 4.1 Antenna test PCB (option)
If you are planning a device with embedded antennas then it is highly recommended that you develop some “empty” test PCBs with the selected antennas and U.FL plugs. The U.FL plugs will be used to feed the antennas with a Vector Network Analyser. The testing and optimisation can be done by your HW team or by the akorIoT team
Step 5 – Power up your first PCBs
Load the code developed at step 2 to your PCB and start with field test. After the field test, you will add the experience thus gained to the next version of your PCB, and further field tests will follow.
Step 6 – Mass production
After the field test you will make a pre-production run followed by mass production. On the customer reference list of the akorIoT team you will find Gillette Order Button which is already in mass production. The button has a forecast of 100K+ IoT devices per year. The cellular antenna of the order button is a customised, reworked version of the one detailed in the IoT/M2M Cookbook. The bill of materials cost for the embedded antenna is 0 USD. The order button was optimised on price and performance. The akorIoT team will be happy to guide you from concept to mass production as well.
Does the akorIoT PCBS gain your interest? Do you have a wireless IoT idea? Do you plan an IoT device with embedded antennas? Do you have an IoT prototype and have a need for optimisation or price? If your answer to any of these qustions is “YES”. Then do not hesitate to drop an email to harald.naumann (at) lte-modem.com and to ask for an akorIoT radio adapter or some engineering services to make your IoT idea reality.